Bring AI to Salesforce, without spending a fortune
Deploy enterprise-grade AI in Salesforce using your existing cloud — secure, native, fast
Turn Your Salesforce Into an AI Powerhouse—Today
100% Native, Declarative AI Platform used by Fortune 500s.
Average SI implementation cost
Significant costs to implement AI solutions outside your architecture.
Months for compliance approval
Regulatory delays create significant go-to-market risks.
Time spent NOT SELLING
Sales reps waste time on admin tasks instead of focusing on deals.
Average SI implementation cost
Enterprise customers face significant costs to implement AI solutions outside their architecture.
Months for compliance approval
Regulatory approval for new AI vendors creates significant go-to-market delays and security risks.
Time spent NOT SELLING
Sales is losing time on admin tasks instead of focusing on deals, while you are forced to figure out your AI strategy.
Skip the Build. Scale the Benefits.
Transform your work with automation to Skyrocket revenue, Improve decision-making, and Cut costs.
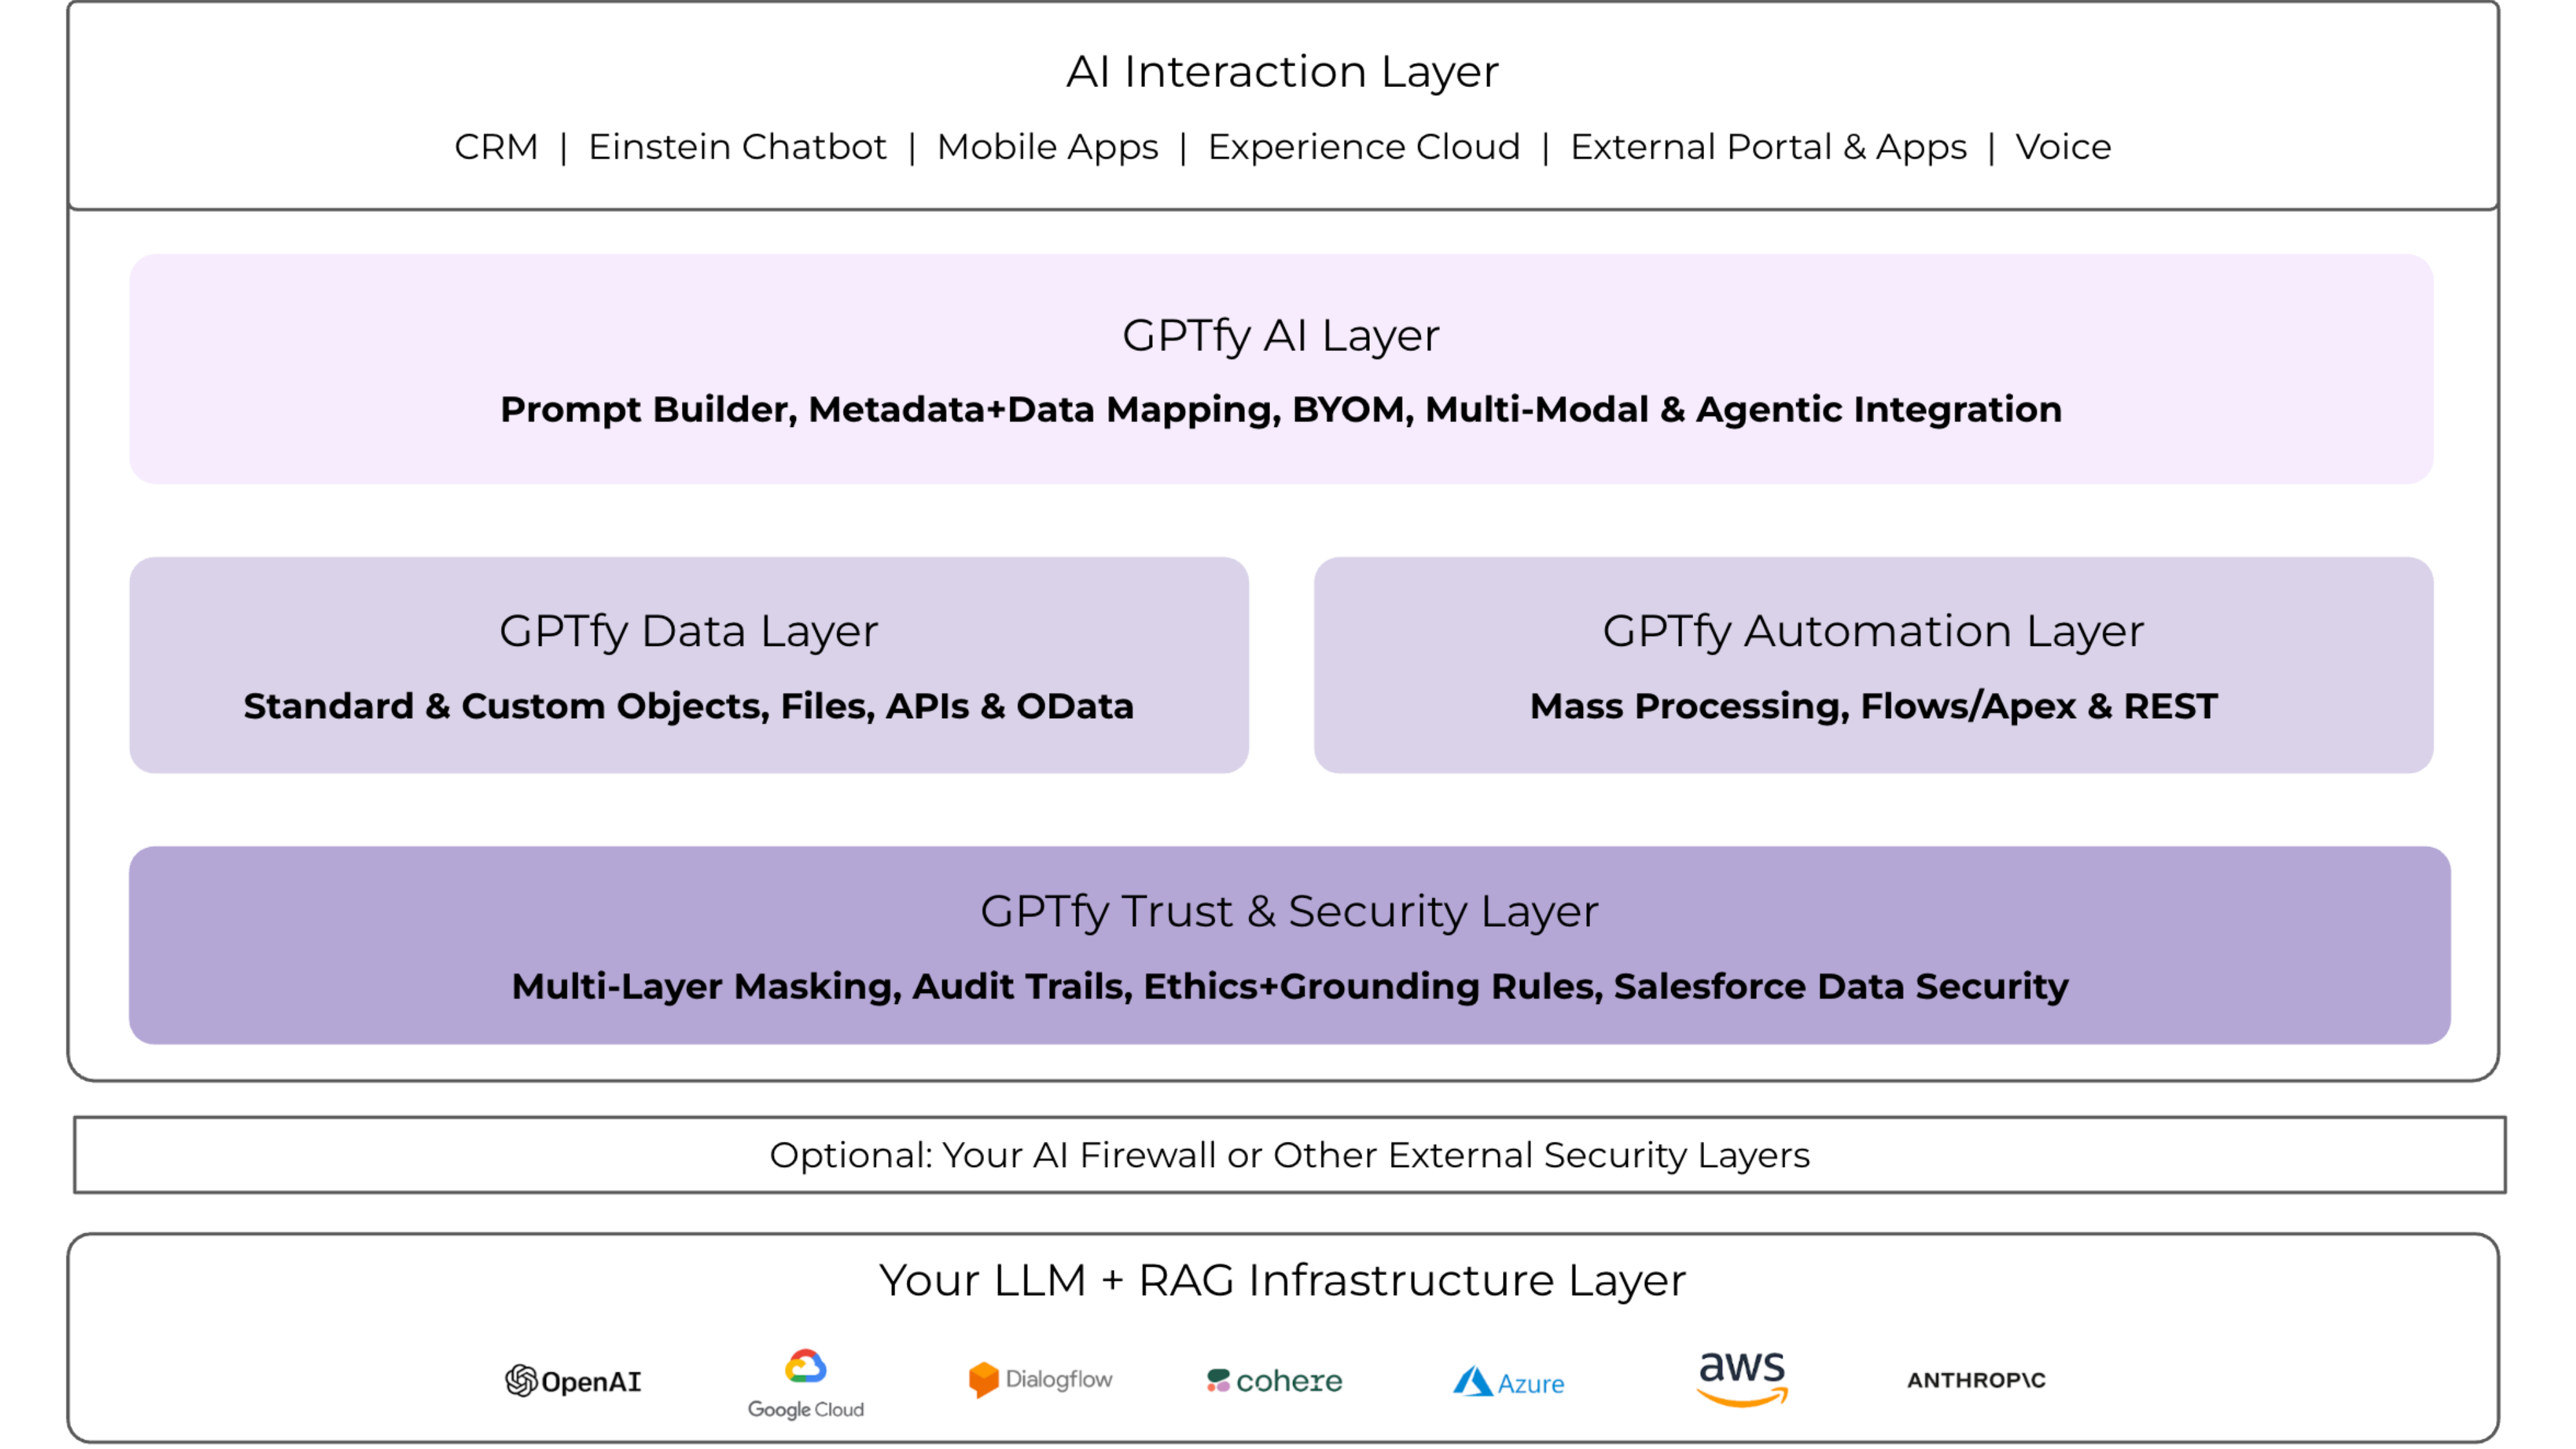
Enterprise AI Without Complexity
More security. Less data exposure.
100% Salesforce Native
Deploy AI within your org using your security model with multi-layered PII protection.
Bring Your Own AI Model
Connect to Azure, AWS, Google, or Anthropic through your existing AI infrastructure.
Zero-code deployment
Implement AI with clicks, not code through our intuitive setup interface.
Build AI Prompts Without Code
Declarative Prompt Configuration
Create sophisticated AI prompts using our visual interface. Configure context, instructions, and output formatting with simple clicks—no technical expertise required.
Dynamic Salesforce Integration
Automatically pull data from any Salesforce object or field to create contextually rich prompts that deliver accurate, relevant AI responses every time.
Supercharge Einstein Chatbot with AI
Enhanced Customer Support
Transform your Einstein Chatbot with advanced AI capabilities. Provide more accurate responses, handle complex queries, and deliver personalized customer experiences at scale.
Seamless Integration
Connect your preferred AI model to Einstein Chatbot without disrupting existing workflows. Maintain all native Salesforce security while adding powerful AI intelligence.
Voice-Powered Salesforce Automation
Hands-Free Data Entry
Convert voice recordings into structured Salesforce data instantly. Sales reps can update opportunities, log activities, and capture meeting notes while driving or walking between meetings.
AI-Powered Transcription
Advanced speech recognition automatically formats voice inputs into proper Salesforce fields, saving hours of manual data entry and improving CRM accuracy.
RAG-Driven Document Intelligence
Extract Insights from Any File
Upload contracts, proposals, financial documents, or reports and get AI-powered analysis directly in Salesforce. Extract key information, identify risks, and generate summaries automatically.
Secure Document Processing
Process sensitive documents within your Salesforce environment without sending data to external systems. Maintain compliance while unlocking valuable insights from your files.
Enterprises Trust Our Approach
"Loved the easy and click/no-code way to configure GPT LLMs on any Salesforce object and go-live in days."
Gurditta Garg
Chief Salesforce Evangelist, Motorola

"It enables Salesforce professionals like me to leverage the AI of my choice (BYOM) in a declarative manner."
Sury Ramamurthy
Technical Architect, Innolake Corporation

"Saw this App and was impressed. Saved our team over 15 hours per rep monthly with streamlined workflows."
Amar Rawal
Business Analyst, Origin
Frequently Asked Questions
The pricing for GPTfy starts at $20 per user per month, with a minimum spending requirement of $50,000. This ensures that enough licenses are purchased to fully utilize the product's capabilities within an organization. Learn more about pricing here.
Yes, GPTfy offers a Paid POC model where you can install the product in your test or production environment to evaluate its capabilities. This period allows you to see the product in action before making any commitments. Book a Call with our Sales team to know more about the Paid POC.
GPTfy operates on a 'bring your own model' architecture, meaning your data remains on your instances of Azure, AWS, or GCP. This ensures the highest level of security as the data never leaves your controlled environment. Learn more about Security and Privacy here.
GPTfy includes an ROI dashboard that tracks the amount of time saved by automating tasks, identifies the most active users and frequently used prompts, and calculates the overall efficiency improvement. This helps management to see the tangible benefits of deploying GPTfy.
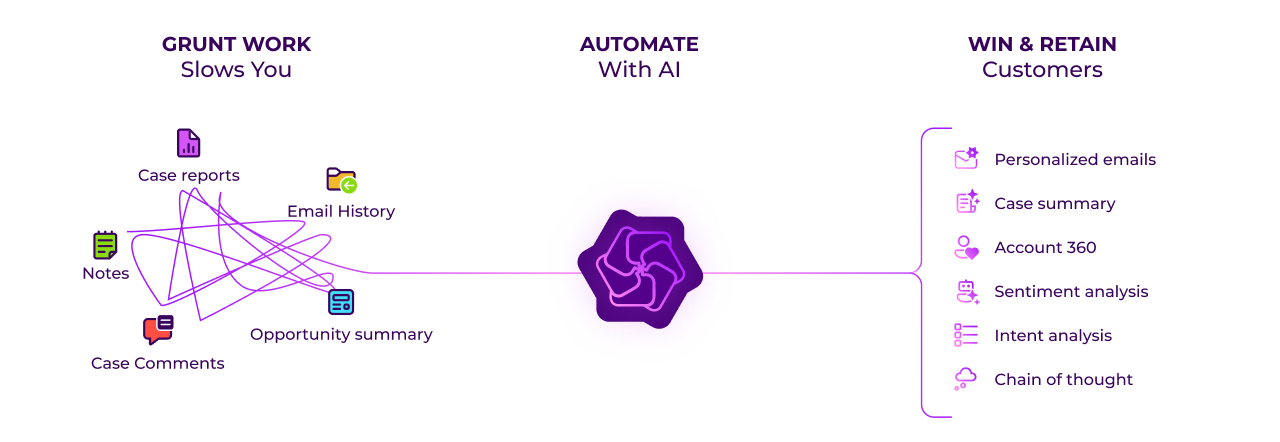
GPTfy can help your sales and support reps reduce mundane tasks and focus on the more important work. Some of the use cases are: Account 360, case summarization, Email 2 Case with AI, Intelligent Case recommendation, Deal Coach, and more. Learn more about specific use cases in our Use Cases section or watch our demo videos to see these capabilities in action.
Starting a pilot program typically involves identifying key stakeholders, choosing a group of initial users, and setting clear goals for the test. After the pilot period ends, results are analyzed to guide a strategic decision.
Built for Salesforce. Designed for You.
Bring AI to your Salesforce Org with an Enterprise solution that fits your architecture. Go-live in weeks, not months.
See your use cases in action, Book 45 mins.100% Salesforce Native. AppExchange Security Approved.
Unlike other AI solutions that send your sensitive data to 3rd Party AI systems without masking, GPTfy runs in your Salesforce Org and uses your company's secured AI infrastructure. Get multi-layered PII protection, and comply with GDPR, FINRA, HIPAA & others.