The Agentforce Alternative,Built 100% Native on Salesforce.
Your models. Your data. Live in weeks.
Brands that trust our products


Your reps still pay the CRM tax.
Sales activity never logged
Emails, calls, and meetings never make it into Salesforce. Your pipeline reflects a fraction of reality.
“They should be focused on the customer more than data entry, so we are taking that out.”
- Director of Sales Operations, Enterprise Retail Analytics
Per rep, every week
Instead of selling, your reps prep reports, build queries, research accounts, and log notes. Five hours that should be revenue.
“I don't want to have thousands of reports built and wait on those queries when perhaps there's a better interface the team can actually use.”
- VP of Sales Ops, Enterprise Technology Distribution
AI running on empty
Incomplete data means your AI investment fails its ROI promise to the CFO. You paid for intelligence. You got guesswork.
“We end up building stuff just for building it, and users just don't capture value out of it.”
- CTO, Financial Services
There has to be a better way. There is.
With GPTfy, deploy agentic AI with your models, fixed pricing, live in days.
of sales activity never reaches your CRM
Forecasts get missed. Pipeline runs on gut feel. AI sits idle on incomplete data.
install. Connect your AI. Done.
Salesforce-native package. Emails auto-sync. Reps don’t change a thing.
of activity captured. AI finally works.
Reps get 5+ hours back weekly. Leadership sees the real pipeline.
See GPTfy in action
Watch the full demo
10-second form · instant access
How It Works
Install from AppExchange
1-click, Salesforce security-reviewed managed package
(opens in a new tab)Connect Your Own AI
OpenAI, Claude, Gemini, Perplexity, or any LLM
100+ Pre-Built Prompts
Ready to go. Customize or create your own through the Prompt Builder
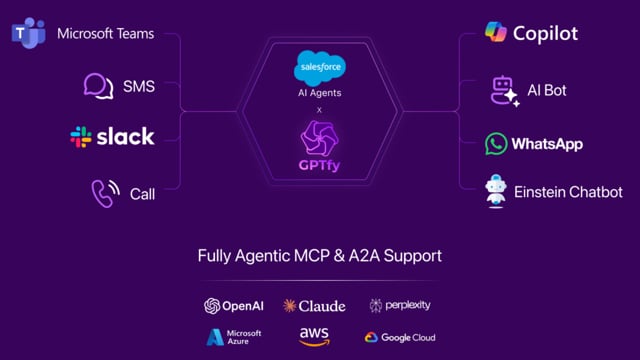
Go Live Everywhere
Salesforce, M365 Copilot, Slack, Teams, Email, Voice
Bring the CRM to them.
Know Every Account. Instantly.
Walk into every meeting fully briefed, in seconds. 98% of activity captured automatically.
- Account 360 Full briefing across opportunities, cases, and contacts
- Deal Coach Spot MEDDIC gaps and get next-best-action guidance
- Score Opportunities ML-powered win probability
Let AI Fill Your CRM.
Automatically sync every email and meeting. Your reps don't log anything. The CRM fills itself.
- Salesforce Gmail-plugin Exchange + Gmail conversations land in Salesforce
- AI Creates Contacts Builds records from CC lists and signatures
- Prevent Ghosting Flag deals going silent and renewal risks early
Automate Their Gruntwork.
Turn inbound emails into cases, quotes, and orders automatically. 97% case deflection. 5,000+ minutes saved per day.
- Email-to-Case AI reads emails and attachments, creates cases or orders
- CPQ Assist Build quotes by describing what you need in plain language
- Einstein Bot RAG with knowledge retrieval, built for call deflection
Show me what's relevant
Your Data. Full Control.
Enterprise-grade security and compliance, built into every layer.
4-Layer Data Masking
Field-level, regex patterns, blocklist keywords, and custom Apex handlers. Data is masked before it is sent to your AI provider. Full audit trails log every interaction.
Explore Security LayerEnterprise-Ready Compliance
AppExchange Security Reviewed. Zero GPTfy servers. Zero caching. GDPR, HIPAA-ready architecture. Raw data never leaves your infrastructure. Only masked data reaches your AI provider via Salesforce Named Credentials.
Security OverviewBuild Agentic AI Without Vendor Lock-In
Deploy autonomous AI agents with JSON schema-based skills, multi-step reasoning, and full Salesforce integration, using your own models, at your price.
JSON Schema-Based Agent Skills
Define agentic prompts with structured JSON schemas. Link them to Apex classes implementing AIAgenticInterface for CRUD operations.
Multi-Agent Orchestration
Coordinate multiple specialized agents across workflows. Sales agents brief accounts, service agents triage cases, all in one unified system.
Explore Prompt BuilderFull Audit & Governance
Every agent action logs to Salesforce Security Audit Records. See exactly what each agent did, when, and why. Full compliance-ready trails included.
Explore Security LayerYour Models, Your Control
Use OpenAI, Claude, Gemini, or any LLM on Azure, AWS, or GCP. No vendor lock-in. Fixed per-user pricing, not per-conversation.
Explore BYOMTrusted by teams worldwide
Loved the easy and click/no-code way to configure GPT LLMs on any Salesforce object and go-live in days.

Gurditta Garg
Chief Salesforce Evangelist · Motorola
It enables Salesforce professionals like me to leverage the AI of my choice (BYOM) in a declarative manner.

Sury Ramamurthy
Technical Architect · Innolake Corporation
Saw this App and was impressed. Saved our team over 15 hours per rep monthly with streamlined workflows.

Amar Rawal
Business Analyst · Origin
Faster to deploy, easier to adopt, and far more natural conversations compared to other Salesforce AI tools.

Dinesh Kumar
Developer · 2SD Technologies Limited
Completely changed how I work in Salesforce with intuitive, powerful AI built directly inside the CRM.

Shantanu Ealiya
Salesforce Developer · TCS
Accurately understands user input and generates high-quality content in the right format every time.

Ankita Dhamgaya
Director and Founder · AlgoCirrus Pvt Limited
Easy to use, does exactly what it promises, and lets you create and deploy prompts in minutes.

Shailesh Varshney
Developer · Capgemini Australia
Setup took under ten minutes with a clean interface and excellent pre-configured prompts.

Salman Khan
Release Manager · IBM
Implementation, intuitive UI, and exceptional support that truly transforms business workflows.

Rishi Golyan
Salesforce Consultant · Algocirrus Private Limited
3 problems. 3 weeks. 3 wins.
Get GPTfy ProveDon't take our word for it. Make us prove it.
Our forward-deployed engineers work alongside your Salesforce admin and business team, in your org, with your data, on your real use cases. No presentations. No guesswork. A working AI solution your team actually uses.
“I'm a firm believer of trying to deploy pilots and seeing the value than just looking at presentations and making some sense out of it.” - CTO, Financial Services
Questions From Sales and RevOps Leaders
GPTfy ships with 20+ pre-built prompts that activate in less than a day. Full deployment (email sync, custom prompts, AI model tuning) takes up to three weeks.
Raw data never leaves your infrastructure. GPTfy is a managed package that runs inside your Salesforce org and transiently sends only masked data to your AI provider through Salesforce Named Credentials. Zero GPTfy servers. Zero caching.
Yes. OpenAI, Claude, Gemini, Perplexity, DeepSeek, Llama: 15+ models on Azure, AWS, or Google Cloud. Use your existing cloud contracts. Switch models without rebuilding.
Fixed per-user/month. Unlimited prompts. No per-conversation charges, no credit consumption, no overages. You pay for AI model usage directly to your provider at your negotiated rates.
GPTfy meets reps where they already work: Salesforce, Outlook, Teams, Slack, Copilot. Email sync runs automatically with zero rep action. AI surfaces inside the tools they already use, not a separate app.
All editions. Sales Cloud, Service Cloud, Experience Cloud, and every industry cloud. No Data Cloud/Agentforce required. Standard Salesforce security model applies.
Popular Salesforce AI guides
Copilot–Salesforce integration approaches
Every way to connect Microsoft Copilot to Salesforce, compared.
What is Copilot-to-Salesforce integration?
The plain-English primer on wiring Copilot into your CRM.
Copilot for Salesforce
Secure Microsoft 365 + CRM, powered by your own models.
RAG in Salesforce
Ground AI answers in your CRM data with retrieval-augmented generation.
Salesforce CPQ + conversational AI
Speed up quoting by describing what you need in plain language.
Named credentials for AI
The secure, Salesforce-native way to connect AI models.
End the CRM tax. Get AI that actually works.
30 minutes. Your data. Your use cases. No commitment required.