This step-by-step guide will walk you through the entire configuration process, ensuring smooth integration with your Azure and Salesforce environments.
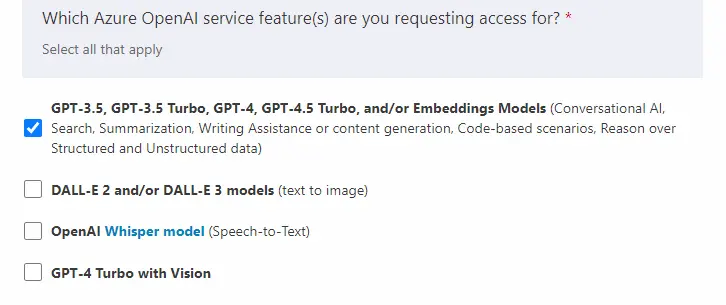
Access to Azure OpenAI in your desired Azure subscription. You can apply for access to Azure OpenAI by completing the form at https://aka.ms/oai/access. While completing this form, select the option below when you come to it:
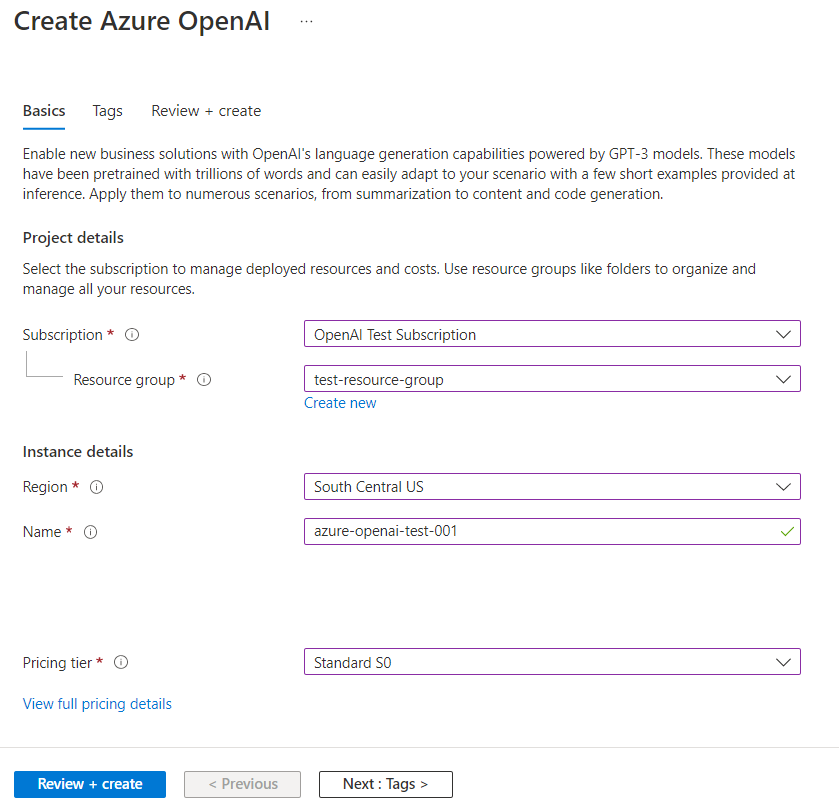
Resource Group: Choose or create a group to hold your OpenAI resource.
Region: Specify the location (may impact latency).
Name: Give your Azure AI service a descriptive name.
Select the only available pricing tier.
2. OpenAI Model Deployment:
Go to https://oai.azure.com/portal. If you need to sign in again, select your subscription and Azure OpenAI resource from the previous steps.
Click Deployments, on the left side of the screen.
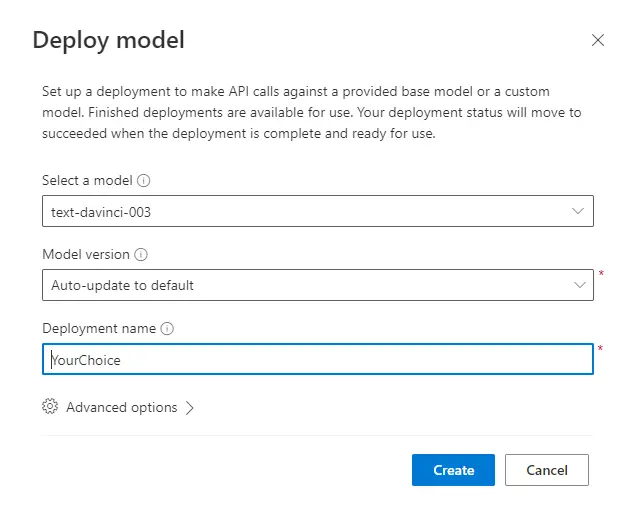
Click “+Create new deployment”.
On the “Deploy model” pop-up that appears, select the desired model and provide a name for the deployment.
3. Salesforce Setup:
To configure a Salesforce org. to work seamlessly with GPTfy and Azure OpenAI, follow these steps:
Step 1: External Credential
Create an external credential to store your Azure OpenAI key.
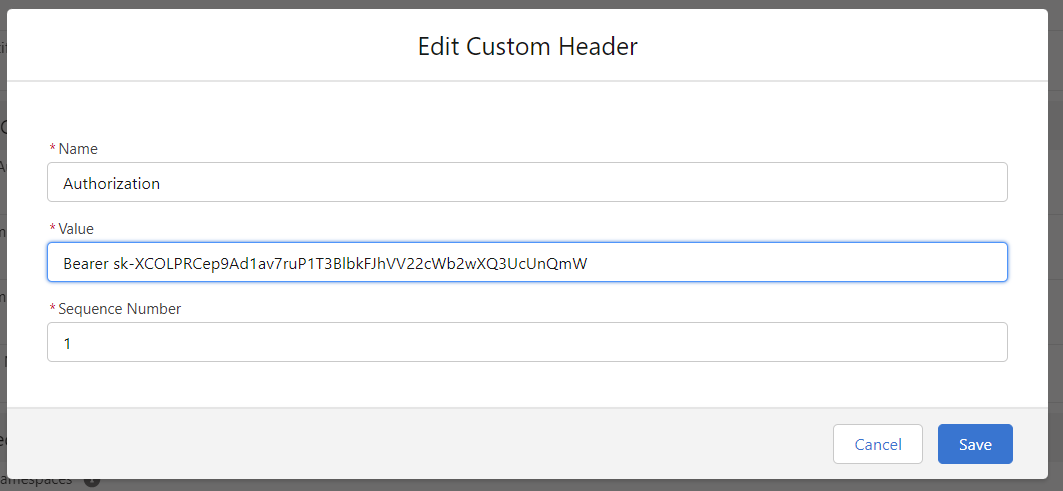
Step 2: Custom Header
Capture and integrate ‘KEY 1’ from Azure into Salesforce.
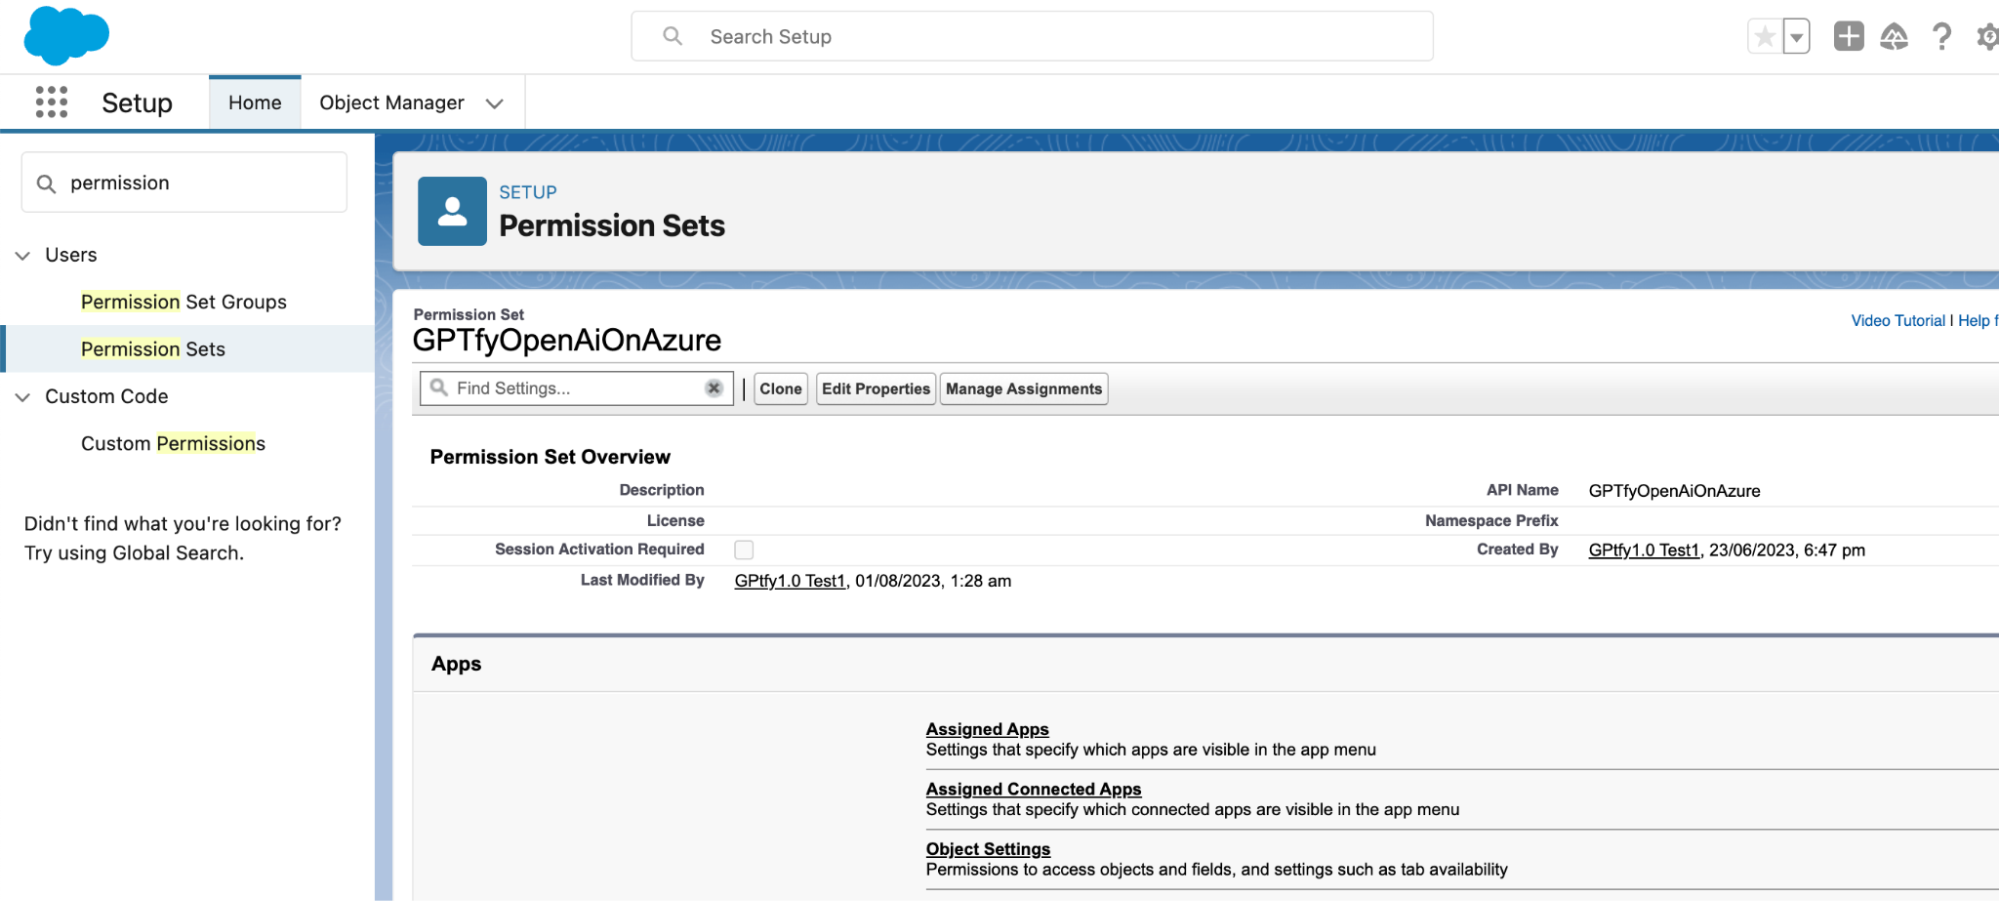
Step 3:Permission Set
Develop a permission set for managing external calls to OpenAI on Azure.
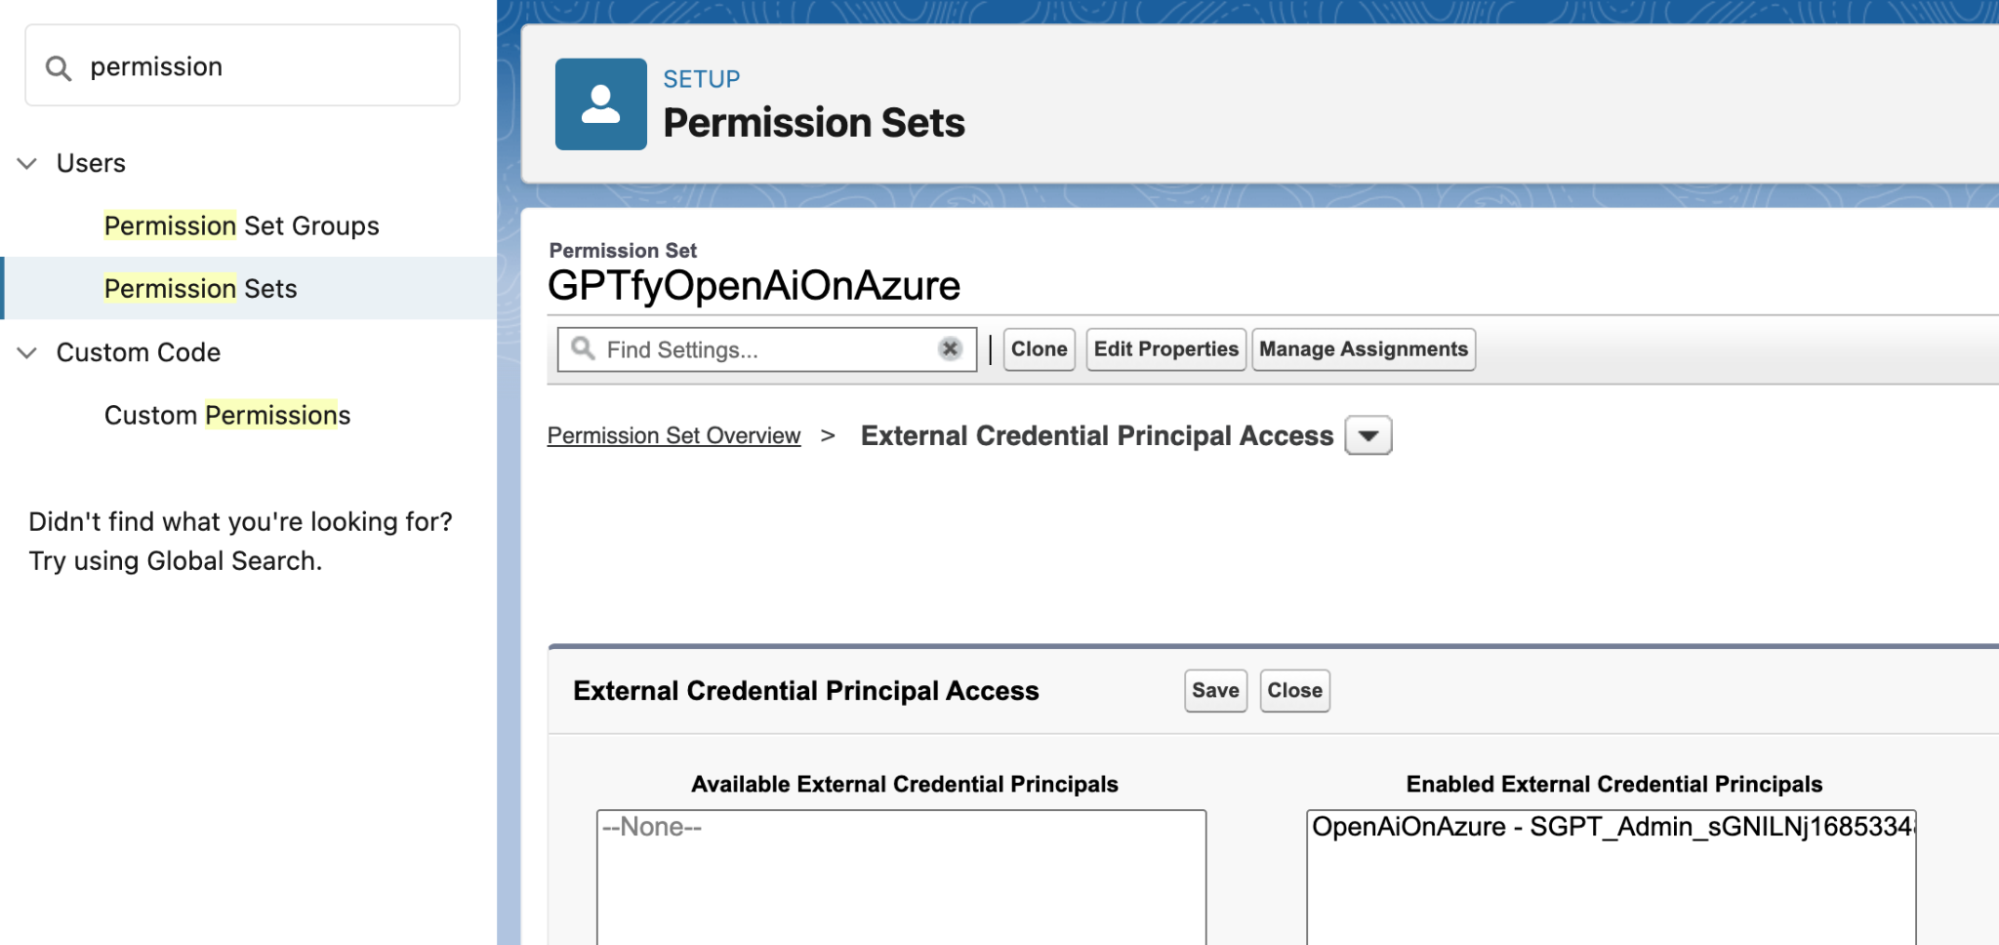
Step 4:External Credential Principal Access
Select the appropriate Available External Credential Principal and save.
Define clear prompts or instructions tailored to your specific needs.
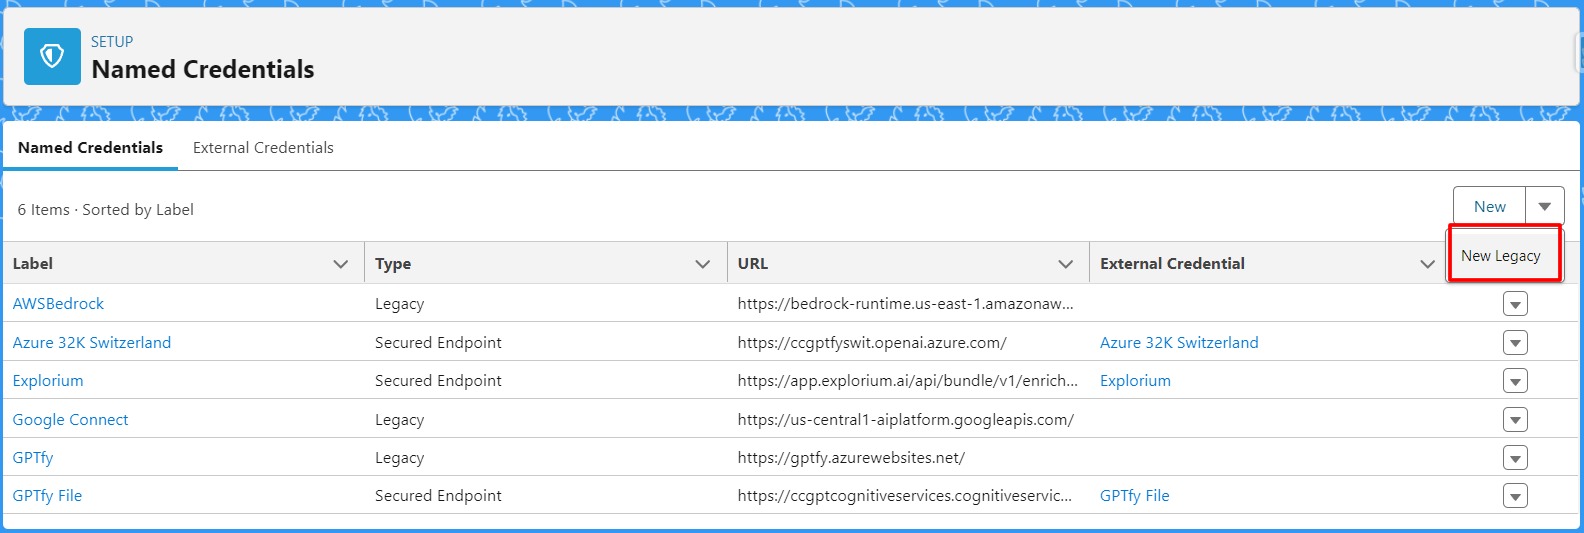
Step 5: Named Credentials
Define Named Credentials with the following:
URL: Copy the ‘Endpoint’ from Azure and paste it into Salesforce.
External Credential: Select the one you created in Step 1 of this section.
Allowed Namespace: ccai
4. Salesforce GPTfy Configurations:
Create a new model connection from GPTfy to OpenAI On Azure
Go to the Cockpit in the GPTfy App and click on AI Models.
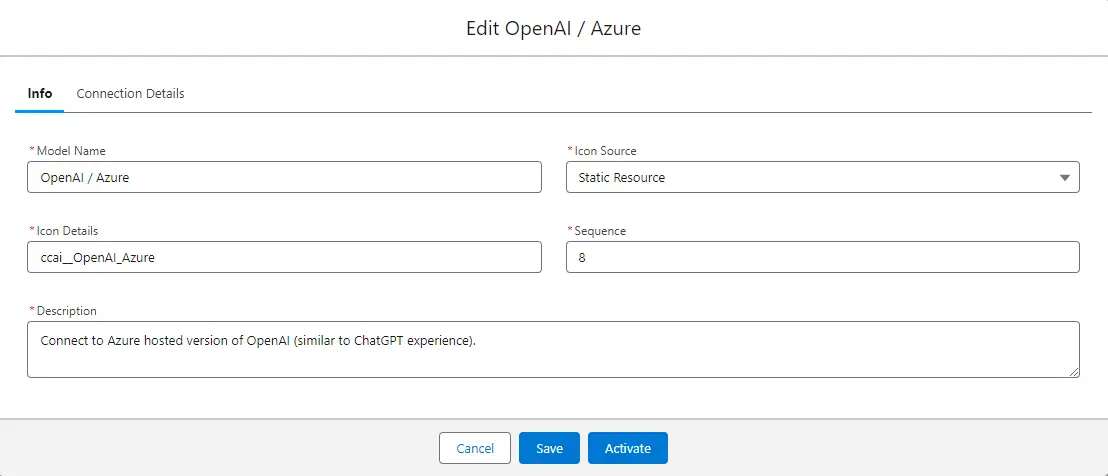
Below is an example of what it might look like. Select OpenAI / Azure.
Add connection info: Select values such as those in the examples in the screenshot below for the Model Name, Icon Details, Description, Icon Source, and Sequence.
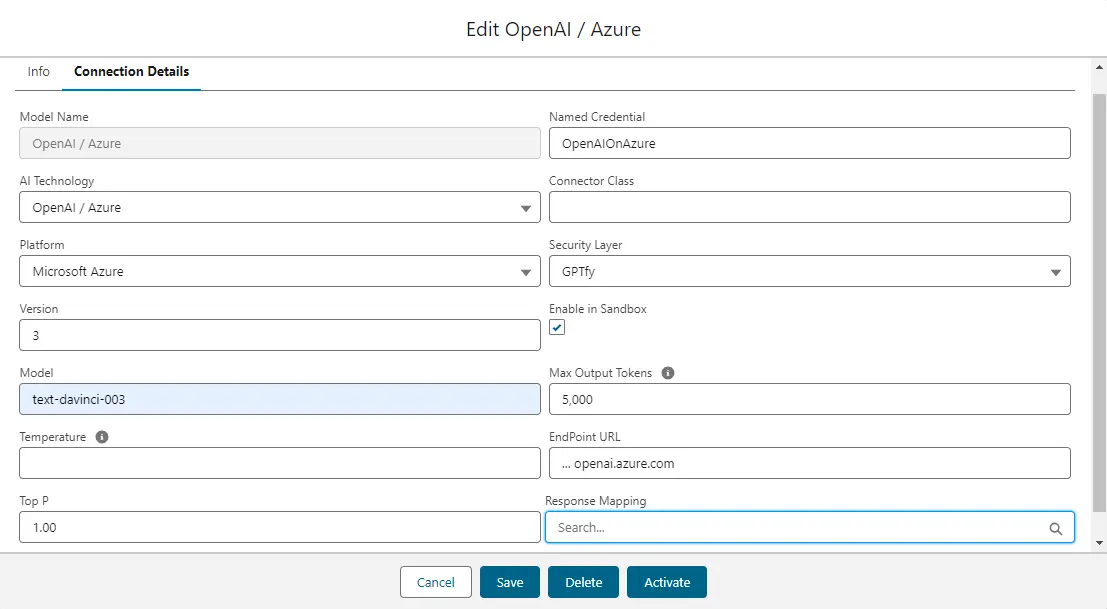
Connection Details: Select values such as those in the examples in the screenshot below for the AI Technology, Platform, Version, Model, Temperature or Top P, Named Credential, Security Layer, Enable in Sandbox, Max Output Tokens, and EndPoint URL.
Note: The Named Credential and Endpoint URL are from Step 5 of Salesforce Setup (just above).
Click “Activate”.
Azure RAG Model:
Go to the Cockpit in the GPTfy App and click on AI Models.
Select Azure RAG
Fill in the information on the Info tab (the screenshot below has examples).
Create Named Credentials and External Credentials, following the steps in section 3. Salesforce Setup (above).
Fill in the Connection Details tab and activate the model.
AWS RAG Model:
Go to the Cockpit in the GPTfy App and click on AI Models.
Click on the AWS RAG Model.
Fill in the information on the Info tab (the screenshot below has examples).
Create Named Credentials, following the steps in section 3. Salesforce Setup (above), but with the type Legacy.
Add details to create the connection and fill in the Connection Details tab.
Save and activate the model.
That’s it! You can now use Azure RAG and AWS Bedrock models with your connection details!