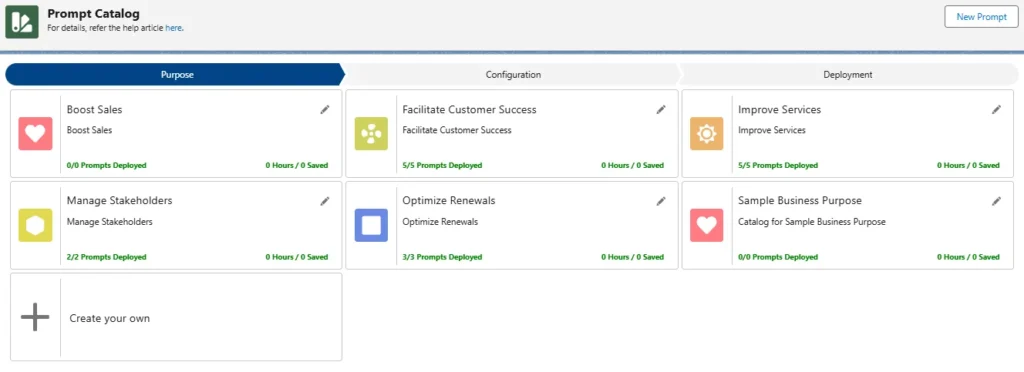
GPTfy’s Prompt Catalog makes it easy to manage AI prompts based on business context and user access. You can create purpose-specific prompt groups, configure usage by object and record type, and control visibility by profile.
This guide walks you through setting up and customizing your Prompt Catalog to align with your business workflows.
Why It Matters
Managing prompts at scale can be complex. With GPTfy’s Prompt Catalog, you can:
- Group prompts by business need or use case
- Control prompt availability based on user profiles
- Restrict prompts by record type or data conditions
- Create custom categories for better organization
Step 1: Access the Prompt Catalog Tab
- Open GPTfy from App Launcher.
- Once the GPTfy is open, navigate to the Prompt Catalog tab.
- Click on the Catalog tab to proceed.
Step 2: Select a Business Purpose
- In the Prompt Catalog tab, you will find a list of available business purposes.
- Click on the desired business purpose from the list.
Step 3: View and Manage Prompts
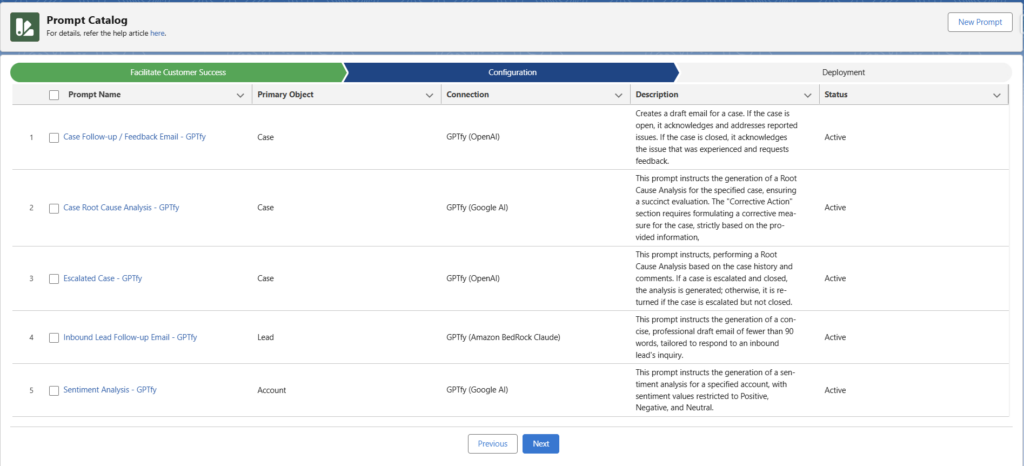
- After selecting a business purpose, the next page displays a list of prompts associated with that purpose.
- The page also provides information about the connection type and status of each prompt.
- Review the list of prompts and if any prompts need to be activated, select them accordingly.
Step 4: Select Required Prompts
- Based on your business requirements, select the prompts that are needed.
- Choose the prompts relevant to your current needs and click on the “Next” button.
Step 5: Configure the Prompts
- On the configuration page, you will find the mapping and object information related to the selected prompt.
- Review the configuration details and click on the “Next” button to proceed.
Step 6: Enable Prompts for Specific Profiles
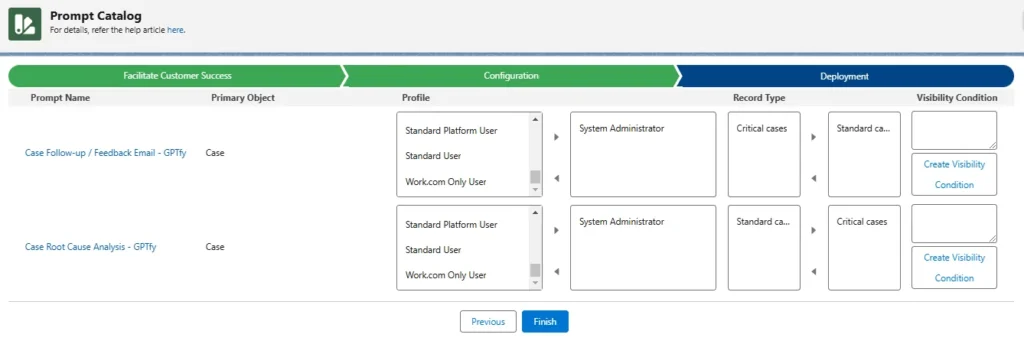
- The enable page allows you to specify the profiles for which the prompt will be made available.
- Select the profile name from the available options and add it to the box right to it.
Step 7: Enable Prompts for specific Record types
- The enable page also allows you to specify the record types for which the prompt will be made available.
- Select the Record type from the available options and add it to the box right to it.
Step 8: Disable Run GPTfy button where Visibility conditions are not met
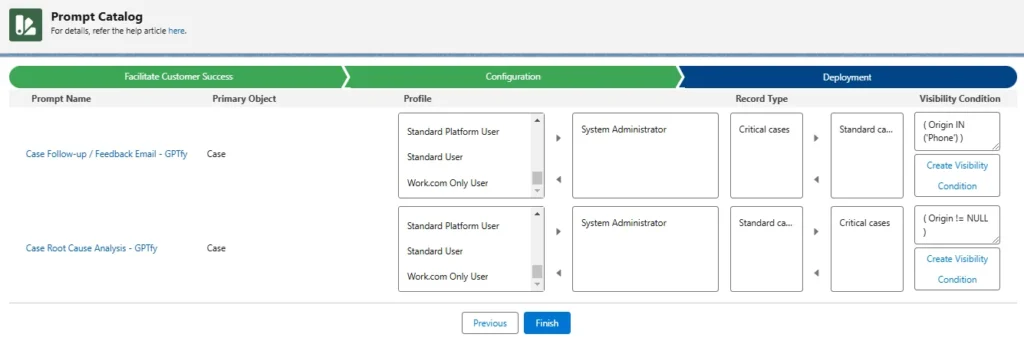
- Admin can easily put the where clause in filter condition to filter out the records where the user will not be able to run the Prompt.
- Create the filter criteria using where clause and disallow to run the prompt on specific records.
- Click on the “Finish” button to activate the prompt for the selected profile.
Step 9: Verify Prompt Activation
After enabling the prompts, check the list of prompts.
Inactive prompts will now be active and assigned to the selected profile.
Create your own
This feature allows the creation of a new business purpose card depending on how the prompts that are going to be created can be grouped.
The step-by-step procedure for creating this custom purpose card is as follows,
Step 1: Select ‘Create your own’ card
- Click on the ‘Create your own’ card on the list of catalog cards available.
- This will open up a window.
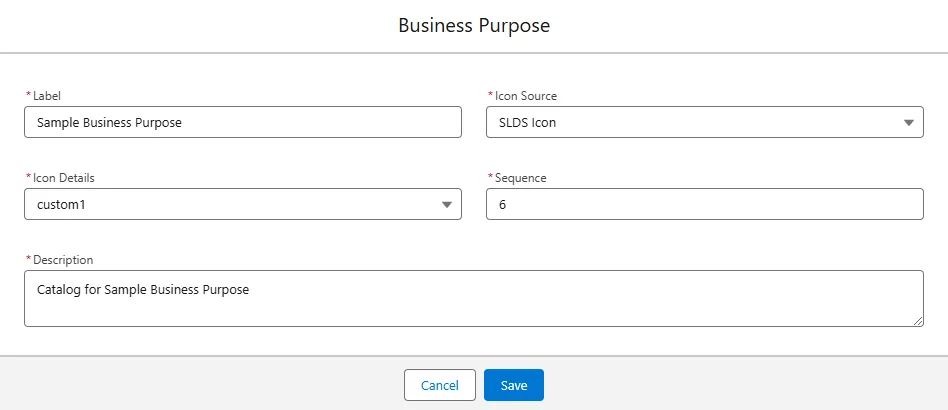
Step 2: Add Details
- Label: Name of the business purpose
- Icon Source:
- Choose Static Resource to upload a custom logo (use the API name of the resource)
- Or choose SLDS Icon to select from built-in Salesforce icons
- Choose Static Resource to upload a custom logo (use the API name of the resource)
- Sequence: Determines the order in which this card appears
- Description: Brief summary displayed on the card
Step 3: Click Save.
- Once Save button is clicked, it will validate for all the required data.
- Upon saving, a new tile in the prompt catalog will be created when the page is reloaded.
- A new record should be created under GPTfy card configurations in enabled status. Make sure the list view is selected as Catalog.
- Once the card is created, whenever a prompt is created for this purpose, it can be added in the Prompt Builder Configuration Tab.
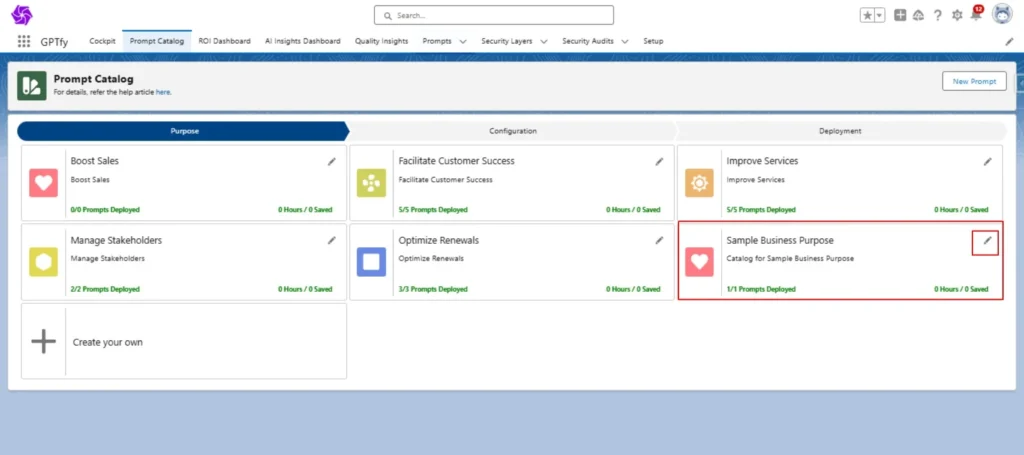
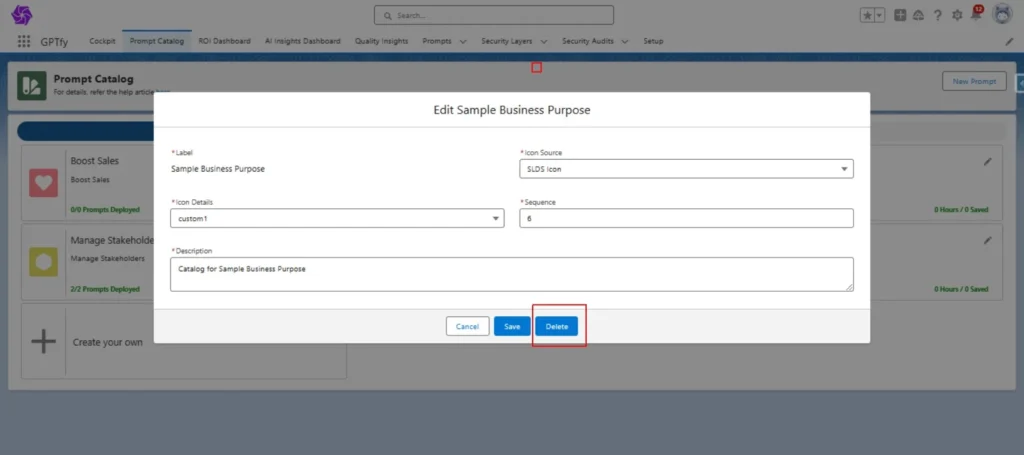
- Users can edit the Prompt Catalog card by clicking on the pencil icon. To delete, click on the Delete button.
So, that’s the breakdown on configuring the Prompt Catalog in GPTfy!
By following these steps, you can organize your prompts for business purposes and make them accessible to the specific profiles that need them.
Happy prompting!


